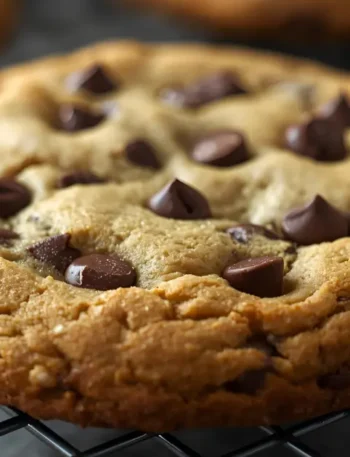
For many of us, the most memorable part of a school lunch wasn’t the pizza or the mystery meat—it was the cookie. The classic school cafeteria cookie was distinct: huge, thick, delightfully chewy, and often slightly underbaked in the center, ensuring a melt-in-your-mouth experience. It tasted unlike any homemade or store-bought cookie, and that’s because the cafeteria cooks used a few industrial secrets to achieve that perfect texture.
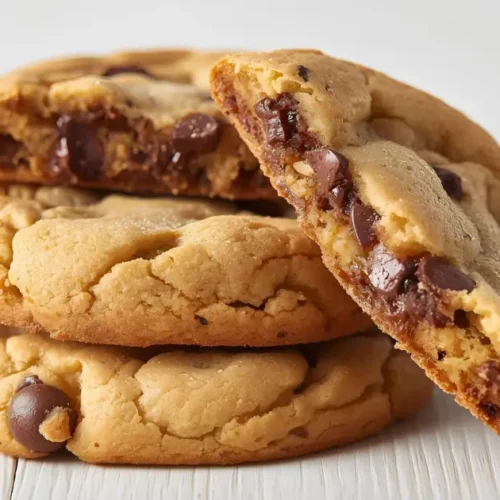
Giant School Cafeteria Cookies Copycat
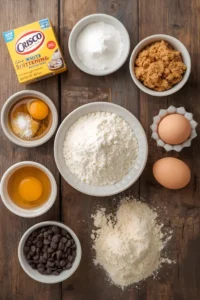
Ingredients
1 cup mini semi-sweet chocolate chips
Notes
We’ve cracked the code to bring that nostalgia straight to your kitchen. This recipe captures the essence of that beloved treat, using techniques specifically geared toward achieving that legendary softness and bulk, making it a guaranteed hit for your kids—or just for your inner child.
What Makes a Cafeteria Cookie Unique?
The Classic School Cafeteria Cookie Recipe
This recipe is specifically formulated to replicate the rich, soft texture and iconic size of the cookies served in American school cafeterias.
Instructions
- Cream Fats and Sugars: In a stand mixer fitted with the paddle attachment, or using a hand mixer, beat the softened butter, shortening, white sugar, and brown sugar on medium speed for 3-5 minutes until the mixture is very light and fluffy. This step is crucial for volume.
- Add Wet Ingredients: Add the eggs one at a time, beating well after each addition. Stir in the vanilla extract. Scrape down the sides of the bowl.
- Combine Dry Ingredients: In a separate medium bowl, whisk together the flour, baking soda, salt, and baking powder.
- Mix Dough: Gradually add the dry ingredients to the wet mixture on low speed, mixing only until the dough is just combined. Do not overmix!
- Fold in Chips: Gently stir in the mini chocolate chips using a spatula.
- Scoop Big: Line a baking sheet with parchment paper. Use a large 3 or 4-ounce scoop (about a heaping 1/4 cup) for each cookie to replicate the cafeteria’s giant size. Place them 3 inches apart.
- Bake: Preheat your oven to 350°F (175°C). Bake for 10–13 minutes. The edges should be set and light golden brown, but the center should still look puffy and slightly soft.
- Cool for Chewy Perfection: Leave the cookies on the hot baking sheet for 5-10 minutes after removing them from the oven. They will continue to cook and settle into that thick, chewy texture. Transfer them to a wire rack to cool completely.
Secrets to That Iconic Soft & Thick Texture
Achieving the authentic school cafeteria cookie texture is all about the balance of ingredients and process.
The Secret is in the Fat Blend
While all-butter cookies are delicious, the classic cafeteria texture is achieved by using a blend of butter and vegetable shortening. Shortening has a higher melting point than butter, which means the cookies hold their shape longer in the oven, resulting in a significantly thicker and bulkier cookie that stays soft.
Making Them School-Safe
As schools increasingly enforce allergy policies, many parents seek out lunchbox treats that are free from common allergens. This recipe, as written, is nut-free.
However, if you are looking for even more variety in your baked goods, check out the guide for the Best Nut-Free School Lunch Cookies. It offers guaranteed classroom-friendly alternatives.
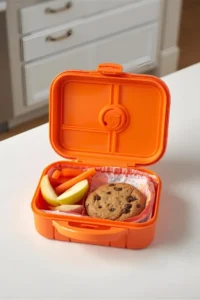
Perfecting the Lunchbox Menu
These giant cookies are a perfect once-a-week treat, but preparing a variety of nutritious, easy meals is key for busy parents.
Quick and Easy Lunch Pairings
The sweet cookie is best paired with a quick and savory main course. Instead of complex sandwiches, consider making simple, lean, and satisfying options. For great ideas that minimize kitchen time, explore other useful resources like my guide on Quick Chicken Wraps for Busy Moms.
For a complete set of hassle-free ideas that keep your kids energized, you can find a whole range of nutritious and appealing options in the Healthy Lunchbox Recipes for Kids section.
Frequently Asked Questions (FAQ)
Q: Can I use all butter instead of butter and shortening? A: Yes, but the texture will be different. Using all butter will result in a flatter, crispier cookie. If you use all butter, make sure to chill the dough for at least 30 minutes to minimize spread.
Q: Why did my cookies spread too much? A: Common culprits are:
- Warm Dough: The dough should be room temperature or slightly chilled, not warm.
- Too Much Butter/Melted Butter: The ratio of fat to flour might be off, or your butter was too soft.
- Oven Temperature: Ensure your oven is accurately set to 350°F (175°C); lower temperatures encourage spreading.
Q: Can I freeze the baked cookies? A: Yes. Once fully cooled, store them in an airtight freezer-safe container for up to 3 months. Thaw them overnight at room temperature or warm them gently in the microwave for that fresh-baked gooey center.